My Blog List
-
-
-
Friday. New Kits loaded to PFD8 years ago
Subscribe To


Showing posts with label Bibi's Collection. Show all posts
Showing posts with label Bibi's Collection. Show all posts
Monday, October 13, 2014
 Follow No One ~ PTU
This tag uses a beautiful tube by Alex P. from PFD that you can purchase here. The kit is from Bibi, and you can get it here. I always start with 700 x 700, and you can gradient glow and/or drop shadow anytime you want in the creating process, depending on how you like it. I used papers 1, 2, and 7. The masks used are Mask12_Kreations and Circle2byTonya-vi. These masks are at Creative Misfit Creations here. My last layer is element 60 placed how I wanted, duplicated, mirrored, duplicated, flipped, duplicated, mirrored, and merged all those down to one, so four in one layer. Element 51 is next with the same process. I make them where I can see them. I check, when I am done to make sure all can be seen. Element 61 is in front of that with the same process. Element 59 was done the same way in front of that. Paper 1 with the first mask is the next layer. The sizes are different depending on how I want them to be seen. Element 100 is in front of that with the duplicate/mirror/flip, so there are four where you want them on one page. Paper 2 is next with the same mask as Paper 1. They aren't going the same ways because of flipping one. Element 92 is placed where I wanted it in front of that. Element 23 is in front of that about in the middle, so I can see it on the sides. Element 78 is in front of that. I made it larger. Element 87 is next, and I made it larger, too. Element 53 is in front of that placed how I wanted it seen. Paper 7 is in front of that with the Circle mask. Element 55 is placed next, and I believe it is rotated 90 degrees to be up and down. Element 29 is in front of that. Element 28 is in front of that placed like I wanted. Element 98 is next sized to how I wanted. Element 48 is in front of that. Element 26 is placed on one side how I wanted, duplicated, mirrored, and merged down. Element 25 is in front of that. Element 40 is in front of that placed to be seen. Element 30 is in front of that placed to come down from the cloud like formation I will tell you about later. Element 95 was placed on a side to fit, duplicated, mirrored, and merged down. Element 24 was placed with element 99 and 36 to form the cloud looking formation. Once I had them how I wanted, I merged them down, so they stayed together. Element 58 was placed to be seen in front of that. Element 38 was placed on a side how I wanted, duplicated, mirrored, and merged down. Element 41 was done the same way. Element 37 was sized as appropriate for a corner, duplicated, mirrored, duplicated, flipped, duplicated, mirrored, and all layers merged down, so to have four of them the way I wanted. From there, I placed my tube, artist copyright, my watermark, my statement of choice, and a name to finish the tag off. I hope you enjoy! I have more than this one, but it is the one I chose to show here. My group in new.myboomersplace.com will see the rest. The group is called Grade A Smartasses, so you can join to ask for tags if you would like. Hugz~~ Karee
Tuesday, June 17, 2014
Tag Show off Bibi's Collection

Wednesday, May 7, 2014
Gotta Love My Cuteness

I made this tag with the wonderful kit Lolas by Bibi that you can get here at S&Co. The tube I am using is the cute tube Steampunk Babe that you can get here a the PSP Project sight. I start with the 700 x 700 image, so let's get to the tutorial. I used papers 5, 9, 8, and 12, and I used masks Becky_Mask022, Becky_Mask033 and Breezemisfitschoicemask3. I get these at Creative Misfits Creations here. The last layer is paper 9 with paper 5 in front of it. The masks used for them are the Becky ones. Anywhere and/or on anything you can gradient glow and/or drop shadow for effect. In front of them, I put element 79 where I wanted it in a corner to be seen, duplicated, flipped, duplicated, mirrored, duplicated, and flipped, so I had four. One for each corner, and I merged those layers down. I put element 111 in front of that where I wanted to see it. I duplicated it, and I merged the layers down. Element 69 is in front of that. I put one on a side the way I wanted, duplicated, mirrored, and merged down. Then, I put element 94 to look like it is hooking onto the elements behind it, duplicated, flipped, and merged down. Element 45 is in front of that put in a way I could see the circle part, duplicated, mirrored, flipped, and merged down. Element 23 is in front of that in a size where you can see it through the blades and around them a bit. Element 19 is in front of that with element 20 in front of it. I put them so the edges were all right, and the openings can match up. Element 81 is in front of that. I placed it in a part where I could see some of it duplicated, flipped, duplicated, mirrored, duplicated, mirrored, and merged all of the bubble layers together. Element 71 is in front of that, but element 11 was placed first because the web has to be put in the circle just right to match edges. Element 50 is in front of that. I put is on half of the tag, duplicated, mirrored, flipped, and merged the layers down. In front of that, there is paper 12 and paper 8 with the Breeze mask. Each one has different sizes to them to look like they do. Element 44 is in front of that where you want it. Element 41 is in front of that wherever you want to put it. The last element is 7. You can put it where you feel the need. From there, I put the artist copyright, my watermark, my statement, and a name! Below, I have some more tags from the kit. A couple of them have an added element or two. They use tube from The Hunter, Zlata Ma, and Alex Prihodoko. Remember that you can reach me by email and show me what you come up with! No one does, but it is worth asking...

Monday, March 3, 2014
Ominously Appealing
I am using the wonderful kit Baby Blue by Bibi's Collection. You can buy it here at S&Co. The art work is from Barbara Jensen. That tube you can get here. Of course, I did some coloring on it to make it match the background with the hue and saturation. Let's open a 700 x 700 and get started. I used papers 5, 1, and 2, and I used masks TBT_CircleMask2, ApCircle4, and AR315_CMC_mask85. These masks are from Creative Misfits Creations here. My last layer is paper 5 with the last mask on it. The next layer is paper 1 with the first mask on it. Element 5 was put in front of that big enough to see in certain parts. Make sure you gradient glow and/or drop shadow whenever and wherever you want. Element 16 is in front of that. I made it big to cover the top the way I wanted it to be seen, duplicated, flipped, and merged those layers down. Element 23 was put in front of that in a corner as I wanted to be able to see part of it. I duplicated, mirrored, duplicated, flipped, duplicated, mirrored, and merged all four layers down, so I could have four if them where I wanted to see them. Element 21 is in front of that where I wanted to see it, so it is more in the center. I put it where I wanted to see it, duplicated, flipped, and merged the layers together to have one on bottom and top. Element 49 is in front of that placed where I wanted to see it. I duplicated, flipped, and merged those layers down to have them on top and bottom. Element 57 is in front of that. I put it on a side, so I could see if coming out, so I had to rotate it. From there, I duplicated, mirrored, and merged the layers down. In front of it, there is paper 2 with the second mask. Element 71 is in front if that layer. I placed it how I wanted to see it and just left one layer. Element 54 is in front of that. It was put on the side to show what I wanted of it, duplicated, mirrored, and merged down. Then, I put element 43 in front of that. I used Eye Candy 5 bevel on it, and I put it not look like a frame, but go with the background. Element 55 is in front of that. I put one on a side where I wanted it, duplicated, mirrored, and merged the layers down. It covers, but allows you to see the frame. Element 62 is in front of that. I got it where I wanted, duplicated, flipped, mirrored, and merged them down. That way it was going the opposite direction. Element 48 is on there next. I have two layers of it. The under one is colored like the tag below, and the regular colors are put on top of that. Make sure you get them even, if you change the size of them. Element 35 is in front of that. I put it how I wanted it, duplicated, flipped, moved the bottom part around how I wanted, and I merged the layers down. Element 22 is in front of that. I placed on on the top where I wanted, duplicated, flipped, and merged the layers down. Element 33 is in front of that. I put one on the side how I wanted, duplicated, mirrored, and merged down. Element 68 is in front of that. I used Eye Candy 5 Bevel on it, duplicated, put them where I liked them, and merged the layer down. Element 2 is in front of that. I put it where I wanted it, duplicated, mirrored, and merged down. From there, I put my tube, my copyright, my watermark, and a name. Below, I have a tag with a Vermany tube and a change in some of the background, and two more with Barbara Jensen tags on them. My email is there for questions and/or any tags you would like to show me. I would appreciate it! Hugz~~
Tuesday, February 18, 2014
Tragically Rockin' Beautiful - Barbara Jensen
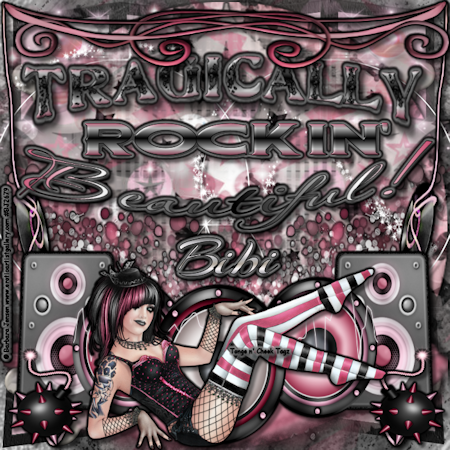
This is my original creation. I used the kit Lovely Rockdoll by Bibi's Collection that you can find at S&CO here. The tube is by Barbara Jensen. You can find it here. I am using Paint Shop Pro X 2 Ultimate. Start with your 700x700 new image open, and we begin. I used papers 3 and 6. Plus, I used masks MisfitsChoiceMask4 from Creative Misfits Creations here, and weescotlass' WSL_Mask_143 you can get here. The last layer is the paper 3 with the mask from misfits creations. Gradient glow and/or drop shadow whenever and wherever you want in the process to make things stand out and/or be darker. The next layer is element 5 flipped upside down and placed how you want it. Element 50 is the layer in front of that one. Element 68 is in front of that layer. I made them all big to see them on the edges. Element 37 is in front of that one, and you can put it where you want to be able to see it most through the paper. Element 83 is in front of that. I placed one where I wanted it in the left hand corner to show as much as I wanted, duplicated, mirrored, and merged the layer down. Layer with paper 6 and the WSL mask on it is in front of that. Element 25 is in front of that where you can see it the most. Element 87 is in front of that. I duplicated, mirrored it, and merged down, once I had it where I wanted. Element 70 is in front of that. I flipped it upside down, duplicated, mirrored, and merged down. Element 26 is in front of that. I flipped it, too, and I played with it to have it placed right with the layer behind and those in front. Element 85 is in front of that. I placed it where I wanted it to be seen the best. Element 65 is in front of that. I placed one on a side as I wanted to see it, duplicated, mirrored, and merged down. My word Tragically is the next layer. In front of that, I have the element 73, so it would meet in the middle. I had to duplicate, mirror, and merge down to have them together like that. In front of that, I have element 80 sized to how I like with element 11 sized down to how I wanted, so they looked like one component. I merged all the layers down together, so they were one component for me to move around. I did, also, flip element 11, before I put it together with the speaker element. Element 78 is placed on a side you like duplicated, mirrored, and merged down. From there, you put whatever tube, a statement of my choice, the artist's copyright, your watermark, and keep the name open to be able to change it. Below, I have tags I made with the background that have tubes from Verymany, Arthur Crowe, and Alex Prihodko. Shows the differences you can make with one background. You can reach me at my email, and enjoy the tut!

Friday, January 24, 2014
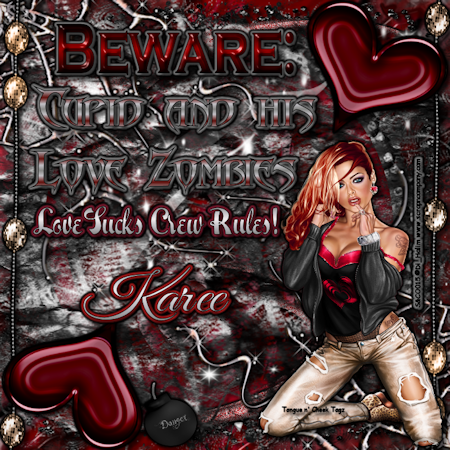
Eff Off Cupid with Di_Halim tube

I used the great kit Love Sucks by Bibi's Collection that you can get at S&Co here, and the wonderful tube that goes with it by Di_Halim that you can get at the same store here. I started with 700 x 700 in PSP X2 Ultimate. You should have a knowledge of how to use it. Papers used were 5, 6, and 7. Masks used were TBT_CircleMask1, TBT_CircleMask2, and ta8. They are available at Creative Misfits Creations here. In this process, you can gradient glow and/or drop shadow whenever you want. From the back, papers 6 and 5 with the Circle Masks are back there. Element 25 is in front of that with a motion trail and inner bevel from eye candy 3.1. I did it to one, duplicated, mirrored, and merged those layers down. Element 27 is in front of that to the size you like, so you can see enough of it. Element 69 was placed in front of that with enough of it seen. Element 71 is in front of that in a place I wanted, so you can see part of it. I duplicated, flipped, and mirrored, so it would be on the bottom backwards. That way you can see it how I wanted. Paper 7 with ta8 mask is in front of that. Element 32 is in front of that. I placed it in the corner, so I could see the edges, duplicated, and mirrored. That way, one is in each corner. Element 82 is in front of that placed where I could see it and where I wanted. Element 83 was placed on the bottom to be seen, duplicated, and flipped to have one on both top and bottom. Element 53 is in front of that. I placed it on the side how I wanted, duplicated, mirrored, and flipped it, so they were going the opposite ways. Choose a frame you want to use, use the magic wand to select it, put whatever layer of the tube you want on it, and promote that layer. Delete the part that isn't promoted. Put that image where you want, and I put mine, so the bottom could not be seen. Element 29 is in front of that. I used eye candy 5 bevel on it and placed it in a corner. From there, I duplicated, mirrored, and flipped to have one in each corner. Element 85 was sized how I wanted and placed near the heart element, so it can be seen and read. From there, I put the tube I wanted, the artist's copyright, my watermark, whatever statement, and a name on it. Below, I have a couple another tag with the same tube, and one with an Exclusive PFD tube made by Origash. You can email me about anything.

Sunday, January 19, 2014
Tougher Than I Look - Last Night Kit
This is my creation. I am using the wonderful kit Last Night by Bibi's Collection that you can get here. I started with a 700 x 700 and am working with PSP X2 Ultimate. I used papers 6, 4, and 11 from the back. I used masks RBsummermask4, MisfitsChoiceMask 4, and MythMask31 from the back. These masks are from Creative Misfits Creations here. At any time, you can gradient glow and/or drop shadow in the process. Element 27 was placed in a corner in front of the last paper to show what I wanted, duplicated, mirrored, duplicated, flipped, duplicated, mirrored, and merged all the layers down to have all four together. Next, is the second paper. Element 73 is in front of that placed to show parts where you want. Element 72 is in front of that. I placed it in a corner, duplicated, mirrored, and flipped, so I could have them in opposite corners to show. Element 33 is in front of that. I placed it on the side where I wanted it, duplicated, and mirrored to have them on either side. Element 58 is in front of that. I placed it in a corner, duplicated, mirrored, and flipped it to have them in two opposite corners. Element 3 is in front of that. I placed it where I wanted it, duplicated, and mirrored, so it is like an X on the image and show. In front of that, I have the last paper. I put the effect of blinds on it. You can do it however you want to look. I put element 64 in front of that to look like I wanted. Element 34 is in front of that where you want it to look. Element 31 is placed like a moon in the front of the cloud element and behind element 7, so you can move them how you want them to look. Next in front of element 7, I put element 5 in a place I wanted, duplicated, and flipped it. You can place it how you want. In front of that, I have element 56. From there, you put the tube you want. I am using the beautiful tube of Alex Prihodoko you can buy at PFD here. You need your own watermark, the artist's copyright, and the name you want on it.
Below, I used another Alex tube, an Arthur Crowe tube, and a Barbara Jensen tube on the ones I made with the same background. One has a couple more elements in it

Thursday, January 9, 2014
Baby, I'm A Firework
I am using the scrap kit Midnight Party by Bibi's Collection that you can get at Scraps N Company here. I am using an exclusive tube from PFD that you can get here. I started with my 700 x 700 image in Paint Shop Pro X 2 Ultimate. I used paper 2 out of the papers, and I used masks Nik- static and MythMask 65. I am thinking the masks came from Creative Misfits Creations here. With the MythMask, I took three different colors from the kit and put them each in a raster layer with flood fill, and I used that mask. Each one was moved the way I wanted to show as much of each color. Element 36 is, actually, the very back layer placed how I wanted to see it. I know I moved it around to make it a lot bigger. Remember to gradient glow and drop shadow wherever you want it to look darker and/or stand out. Element 60 is the next layer, and it is made to be covering the whole layer. The next layer is the paper with the mask of Nik - Static made how you want it to look. Element 16 is in front of it, and I put one where I wanted, duplicated it, mirrored it, and I merged the layers down together. Element 20 is in front of that, and I placed them how I wanted with a duplicate, mirror, flip, and merge of the layers down. This way the yellow balls are where I wanted them. Element 64 is in front of that. I have it facing downward, so you can see the waves coming from the rose more. Plus, I did put some motion trail and a form of bevel on it.. In front of it, there is the merged layers of colors with the mask of MythMask 65. Element 79 is in front of that with a placement how you want and added duplicates, flips, and mirrors if wanted. Element 37 of yellow stars is in front of that the way you want it. Element 17 is in front of the placed however you want it. Element 39 of pink bubbles is in front of that. I put it where I wanted and mirrored it, so they are on both sides and merged together. Element 27 is in front of it, and I duplicated to put two flipped, merged, and back to back to be seen how I wanted. Element 29 is in front of that placed on the bottom half of the pic the way I wanted to see it. It is turned 90 degrees, too. Element 57 is in front of that, and I duplicated and mirrored, so they could be on each side. Element 69 is in front of that, and I put it so it covered the sides and the top to be seen. Element 46 is in front of that, and I duplicated it to have two beside each other to see the stars hanging down. Element 82 is in front of that, and I made the hue and saturation different to match the colors. It is placed on the top to show lights across the top. Element 25 is in front if it, so it can be seen in the fireworks and not cover the lights. In front of the blue fireworks, I put element 93 of the bigger fireworks. I duplicated them, mirrored, flipped, and I placed the flipped side how I wanted it next to the regular fireworks, so I could merge the layers together. Element 33 of the star balloons is in front of that placed where and how I wanted, so I could duplicate and mirror for one on each side. I placed elements 70 and 71 each in front of a balloon where I wanted, so I could duplicate and mirror. This way, each is in front of a balloon to show both colors of fireworks. Lastly, I placed element 51 in the bottom right hand corner for some more celebration look. The tube is on with my watermark, the copyright for the artist, the statement of Baby, I'm a Firework, and the name of the person who will be owning it. You can see three more ways to do it below with Ellie and Alex from PFD. Show me anything you make at my email and/or ask any questions. I enjoy any feedback and any followers! Hugz~~ Karee


Saturday, December 28, 2013
Goth By Choice with Di Halim
For this tag, I used the awesome work of Bibi's Collection you can get here at ScrapNCompany. The kit is called Sexy Craziness. Plus, you can get the tube by Di Halim Goth Angel there, too. I started with the 700 x 700, as usual. I used papers 5, 6, and 7 with masks MC_Mask_11, MCbyTonya Mask2_vi, and MCbyTonya Mask4_vi from Creative Misfits Creations here. Element 12 is between the last paper 6 and the next one 7. You place it where you want it, duplicate three times, mirror, and flip, so you have four of them covering the areas you want. In front of those are papers 7 and 5 with masks, so the next element is 11 fit to show as much as you want. Gradient glow and drop shadow where you want in this whole process. Element 25 is placed in front of that so it fits on the page with the spikes. Element 64 is in front of that where you want it to be seen. Then, element 3 of glass is placed where it looks like it comes from element 25. Element 9 is in front of that, so you have the spider web placed how you want. Element 18 of sparkles are in front of those, and I duplicated it with a mirror to have them on both sides. Element 20 of stars is in front of that placed where you want them. I did a duplicate and flip to have them in two places. Element 51 is in front of that. I placed them in the upper left had corner, mirrored, and flipped to have them in both corners. Element 29 is placed on and free rotated 90 degrees, so it is facing the opposite way. It was duplicated and flipped to have on top and bottom. Element 45 is sized and duplicated, so you can place one in front of element 29 and one behind it. This way you can erase what you need to make it look as if it is hanging on the wire. Element 22 is placed on the side how you like, and I duplicated and mirrored to have it on both sides. From there, I put my copyright, my watermark, whatever statement I want to make, and a name on it. Make sure to save as you go, and you can share anything you make with me at my email.
Below are three other tags I made with this background because I liked it so much! I used Di Halim from PFD, an exclusive from PFD, and Anna Liwanag from CDO in these tags. Enjoy!
Saturday, December 14, 2013
Life is a Dream - PTU Snow Queen kit Barbara Jensen tube!

Start with your canvas of 700x700. I used two masks. Mask6bywynter and MC_Mask 13. Most of my masks are from Creative Misfits and Vix, but these are from Creative Misfits here. I used papers 2 and 3. You can gradient glow and drop shadow, wherever you wish. I do it a lot to make things stand out, or to make them look darker. Element 3 is right in front of the back paper. Place it how you like to be able to see as much as you like. Element 5 is front of that the same way as the element before. Element 19 is in front of that. I placed one where I wanted it, duplicated, mirrored, and flipped, so the would be going different ways. Merge those layers together, when they are placed right. Element 72 is placed in front of that to show as much as you want it to with a duplicate and flip. Plus, you merge the layers together. Element 70 is in front of that one with an inner bevel from eye candy 3.1 and drop shadow to make it seen. Your front paper is in front of that with the second mask. Element 51 is in front of that paper. Place the first one where you want it, duplicate, move the second one where you want it, and merge the layers down. Element 46 is in front of that one, sized smaller to fit, and made to stand out. Element 72 is placed in front of that where you want it. Element 4 is in front of that placed how you want it to look. Element 2 is in front of that with a placement of how you like. Element 65 is in front of that with a placement of how you prefer it to look. Element 21 is in front of that fit to the canvas. Element 37 is in front of that around the moon elements with the other element of 26 in front of it sized to fit where it needs to be. Element 73 is placed behind the moon element to look like you want, so element 24 is in front of it sized to fit. In front of that, I put element 8 sized to fit and look right. The tube is the awesome work of Barbara Jensen with a quote by Mother Teresa on it. I love the whole quote, but you can't fit it all on a tag. From there, you make sure you have a copyright, watermark, and a name on it. Below, I have other tags I made with this background. They are different looks for it. One has the work of Alfadesire, and the other two have the work of Disco_science. Anyone with questions can find my email address on the right side, and you can show me what you did with the same kit! I would love to see what you did with my tut. Hugz~~ Karee


Thursday, January 17, 2013
No Angel
Here is another tut from me. I used the art work of Di Halim from pics for design. That you can purchase here. The scrap kit I used is called Hot Jinx by Bibi's Collection. It can be purchased at Scraps and the City here. Filters used are Eye Candy 3.1 and Eye Candy 4. Remember to gradient glow and drop shadow, whenever you desire.
To start, I opened my 700 x 700 image. I used papers 3, 13, and 14 for the background with two different masks. Between the front two mask layers, I copy and pasted element 41, and I sized it to fit in the corner to be seen. Duplicated the layer and mirrored it. In front of that, I pasted element 65 and sized to fit. Element 81 was put in front of that to where I wanted, then duplicated, and flipped it, so it could be seen the way I wanted. Now, the rest is in front of the mask layers. Element 73 was put on to look like it was an effect coming from the moon. Element 53 was copy and pasted on where I wanted, duplicated, and flipped to have it on the top and bottom. Element 51 was put on to look like it was coming up from the bottom cloud effect. Element 11 was copy and pasted on, duplicated to the number you want, and spread to different areas to have them appear around the tag. When I duplicate an element, I, usually, merge the layer down when the fit is right, so I can move it how I want and put effects all at once. Element 19 was put on and sized to fit. I duplicated it. The back one was inner beveled with eye candy 3.1, and the front one I used bevel with eye candy 4 and inner bevel with 3.1. I changed the properties on the front and back, so they would appear the way they are. Element 33 was copy and pasted and sized to fit the bottom of the tag. Element 76, 56, 43, and 13 were used to copy and paste wherever you want to show them. (You may notice that element 56 has the word a lot spelled wrong.) Element 37 and 77 were placed to show a moon with a cloud cover effect. From here, you put your watermark, copyright, and whatever wording you want on the tag. Below, I used the Jinx tubes that can be bought at Scraps and the City, too, and the scrap kit was made to go with them. Please ask questions or show off tags made from my tuts! I would like to have a slide show to show off others, someday. Hugz and thanks for stopping by, Karee

Monday, December 31, 2012
Different I will always be
This was made by me, Karee, December 31st, and any resemblance to another tag is coincidence. It is an original. I am using the beautiful tube of Barbara Jensen that you can get here. The scrap kit is BiBi's Goth 3 that I got at Pics for design which you can get here. I used a lot of elements in this one because it has a lot of them.
I used four papers and two masks to get the background. The papers I used were 7, 8, 9, and 10. I did use the same mask for each which is DBV misfit mask 4 which you can get at Creative Misfit Creations here. Element 63 was added into the background between the front two layers, too. Everything is fit to size, and remember the gradient glow and drop shadow on anything you want at anytime. Going from the last layers to the front, the next layer is element 68 that I free rotated 90 degrees to the left, duplicated, and mirrored. Next is element 70 that I fit to go inside the framework of the round element. Element 90 is on top of that, and I mirrored and flipped it to see more color. Element 60 is in front of that to give some glitter, and it was duplicated, mirrored, and flipped. Element 61 was put to look like the shine was coming from the moon effect. Element 63 was then put around the outer edges of the framework, so it could be seen on edges. Element 106 was put to look like it was behind the moon, but could come out of the edges of the framework and seen through it, too. Elements 21 and 22 were put together in the upper right corner to give the moon effect. Element 11 was put into the framework like it is there with gradient glow and drop, but element 71 was flipped and mirrored without the gradient glow to show white in front. Element 72 was put on duplicated twice with one flipped, and one pulled down to cover the whole mouth of the framework. Element 91 was put up so it fit the framework of the round mouth element, but showed the inside, too. Element 46, the framework, was put and sized to fit, so it wasn't too big in the picture. Element 20 was put at the bottom to fit it and make the cloudy effect. Elements 6 and 7 were placed in the left corner with a mirror and flip to have them on the corners together, but not on top of each other. Elements 110 and 111 were placed on the page, so they were by each other and not on top of each other. Element 2 was placed at the top like a curtain. With that, I put my watermark and Barbara's copyright on it to start my own wording and name. Any questions or tags you want to share can be sent to my email at mizzundaztood1@gmail.com. Thanks for stopping by!
 Below is using the work of Tim Lowery you can buy at AIL here. Essentially, you keep the spiderweb element that I put a gradient glow and drop on, but delete the other one. Take out the curtains and the mouth framework. Instead, you put element 45 after the sparkle you put on three times. Put element 51 after the cloud effect below the cross. Put element 13 and 12 next to each other, and merge the layer down. Element 4 goes in right after 2, so you change it to fit the screen. You put your watermark, the Tim Lowery copyright, and whatever wording you want with a name. I liked this kit, and it was big enough to make more than one tag! Questions and tags go to mizzundaztood1@gmail.com. Thanks, again! Hugz, Karee
Subscribe to:
Posts (Atom)
About Me
- Karee
- Dismal, Kansas, United States
- My name is Karee, and I am a single woman with no kids, except my cat, Onyx. I have been doing tags and PSP for quite some time. It has to be over 6 years, but I haven't kept track. It is what I do to relax and have fun. I run a tagging group on My New Boomer Place, but it is called Grade A Smartasses! Come over there to join in. Hoping to have more FTU and PTU tuts here for you all. Tongue n' Cheek Tagz means I put a statement on my tags, so mine have more than just a name on them! Hugz~ Karee Btw, I can't seem to get blinkies to work on my page for right now. I CT for AIL and follow a lot of blogs. As soon as I can get them to work, I will try to get the blinkies up to make them accessible.
Grab my blinkie

Blogs I fav/CT

TWI