My Blog List
-
-
-
Friday. New Kits loaded to PFD8 years ago
Subscribe To


Showing posts with label Barbara Jensen. Show all posts
Showing posts with label Barbara Jensen. Show all posts
Monday, March 3, 2014
 Ominously Appealing
I am using the wonderful kit Baby Blue by Bibi's Collection. You can buy it here at S&Co. The art work is from Barbara Jensen. That tube you can get here. Of course, I did some coloring on it to make it match the background with the hue and saturation. Let's open a 700 x 700 and get started. I used papers 5, 1, and 2, and I used masks TBT_CircleMask2, ApCircle4, and AR315_CMC_mask85. These masks are from Creative Misfits Creations here. My last layer is paper 5 with the last mask on it. The next layer is paper 1 with the first mask on it. Element 5 was put in front of that big enough to see in certain parts. Make sure you gradient glow and/or drop shadow whenever and wherever you want. Element 16 is in front of that. I made it big to cover the top the way I wanted it to be seen, duplicated, flipped, and merged those layers down. Element 23 was put in front of that in a corner as I wanted to be able to see part of it. I duplicated, mirrored, duplicated, flipped, duplicated, mirrored, and merged all four layers down, so I could have four if them where I wanted to see them. Element 21 is in front of that where I wanted to see it, so it is more in the center. I put it where I wanted to see it, duplicated, flipped, and merged the layers together to have one on bottom and top. Element 49 is in front of that placed where I wanted to see it. I duplicated, flipped, and merged those layers down to have them on top and bottom. Element 57 is in front of that. I put it on a side, so I could see if coming out, so I had to rotate it. From there, I duplicated, mirrored, and merged the layers down. In front of it, there is paper 2 with the second mask. Element 71 is in front if that layer. I placed it how I wanted to see it and just left one layer. Element 54 is in front of that. It was put on the side to show what I wanted of it, duplicated, mirrored, and merged down. Then, I put element 43 in front of that. I used Eye Candy 5 bevel on it, and I put it not look like a frame, but go with the background. Element 55 is in front of that. I put one on a side where I wanted it, duplicated, mirrored, and merged the layers down. It covers, but allows you to see the frame. Element 62 is in front of that. I got it where I wanted, duplicated, flipped, mirrored, and merged them down. That way it was going the opposite direction. Element 48 is on there next. I have two layers of it. The under one is colored like the tag below, and the regular colors are put on top of that. Make sure you get them even, if you change the size of them. Element 35 is in front of that. I put it how I wanted it, duplicated, flipped, moved the bottom part around how I wanted, and I merged the layers down. Element 22 is in front of that. I placed on on the top where I wanted, duplicated, flipped, and merged the layers down. Element 33 is in front of that. I put one on the side how I wanted, duplicated, mirrored, and merged down. Element 68 is in front of that. I used Eye Candy 5 Bevel on it, duplicated, put them where I liked them, and merged the layer down. Element 2 is in front of that. I put it where I wanted it, duplicated, mirrored, and merged down. From there, I put my tube, my copyright, my watermark, and a name. Below, I have a tag with a Vermany tube and a change in some of the background, and two more with Barbara Jensen tags on them. My email is there for questions and/or any tags you would like to show me. I would appreciate it! Hugz~~
Wednesday, February 26, 2014
Pleasantly Dire CT for SS Dran Design
I used SS Dran Designs beautiful kit Dark N Sexy! You can get it at S&Co here. The tube is the gorgeous work of Celinart that you can get here. Ok, let's start with your 700x700 new image. I used papers 1 and 5. The masks I used were 021LT and 9. These you can get at Creative Misfits Creations here. You can gradient glow and/or drop shadow wherever and whenever you want. My last layer is paper 1 with the first mask. In front of that, I have element 11. I put it where I wanted it to be seen, duplicated, mirrored, duplicated, flipped, duplicated, mirrored, and merged all of them down. Element 41 is in front of that. I did the same as I did with the element before with placing it where I wanted it, and I duplicated it to have four with one in each corner. Element 7 is in front of that which I made to cover the whole page to be seen. Element 33 is in front of that. I put it where I wanted it seen, duplicated, mirrored, and merged the layers down. Element 37 was put in front of that, but I evened it to make it straight across the top. I duplicated the layer, but I put element 25 between them. That way, one is behind the grave stone, and the other is in front of it. My paper 5 with the other mask is in front of that. Element 9 is in front of that. I placed it where I wanted it to be seen, either on top of bottom, so you can duplicate, flip, and merge the layers together to have one on top and one on bottom. Element 34 is in front of that. I placed one on a side where I wanted it, duplicated the layer, mirrored, and merged down. Element 46 is in front of that. I placed it how I wanted on top, duplicated, flipped, mirrored, and merged down. That way, I have them on top and bottom going opposite ways. One of my tubes is in front of that with element 17 in front of it. I duplicated the tube and erased what I needed to have her hands in front and her foot behind it all. Element 8 was placed in the upper right corner where I wanted it. From there, I put copyright, watermark, and name on it to make it a finished product. Below, I have three more I made to have different looks. The tubes are from Alex Prihodko, Trinita, and Barbara Jensen. Hope you enjoy and my email is available for any comments or showing off tags you did from my tutorial! Hugz~~ Karee

Tuesday, February 18, 2014
Tragically Rockin' Beautiful - Barbara Jensen
This is my original creation. I used the kit Lovely Rockdoll by Bibi's Collection that you can find at S&CO here. The tube is by Barbara Jensen. You can find it here. I am using Paint Shop Pro X 2 Ultimate. Start with your 700x700 new image open, and we begin. I used papers 3 and 6. Plus, I used masks MisfitsChoiceMask4 from Creative Misfits Creations here, and weescotlass' WSL_Mask_143 you can get here. The last layer is the paper 3 with the mask from misfits creations. Gradient glow and/or drop shadow whenever and wherever you want in the process to make things stand out and/or be darker. The next layer is element 5 flipped upside down and placed how you want it. Element 50 is the layer in front of that one. Element 68 is in front of that layer. I made them all big to see them on the edges. Element 37 is in front of that one, and you can put it where you want to be able to see it most through the paper. Element 83 is in front of that. I placed one where I wanted it in the left hand corner to show as much as I wanted, duplicated, mirrored, and merged the layer down. Layer with paper 6 and the WSL mask on it is in front of that. Element 25 is in front of that where you can see it the most. Element 87 is in front of that. I duplicated, mirrored it, and merged down, once I had it where I wanted. Element 70 is in front of that. I flipped it upside down, duplicated, mirrored, and merged down. Element 26 is in front of that. I flipped it, too, and I played with it to have it placed right with the layer behind and those in front. Element 85 is in front of that. I placed it where I wanted it to be seen the best. Element 65 is in front of that. I placed one on a side as I wanted to see it, duplicated, mirrored, and merged down. My word Tragically is the next layer. In front of that, I have the element 73, so it would meet in the middle. I had to duplicate, mirror, and merge down to have them together like that. In front of that, I have element 80 sized to how I like with element 11 sized down to how I wanted, so they looked like one component. I merged all the layers down together, so they were one component for me to move around. I did, also, flip element 11, before I put it together with the speaker element. Element 78 is placed on a side you like duplicated, mirrored, and merged down. From there, you put whatever tube, a statement of my choice, the artist's copyright, your watermark, and keep the name open to be able to change it. Below, I have tags I made with the background that have tubes from Verymany, Arthur Crowe, and Alex Prihodko. Shows the differences you can make with one background. You can reach me at my email, and enjoy the tut!

Sunday, January 19, 2014
Tougher Than I Look - Last Night Kit
This is my creation. I am using the wonderful kit Last Night by Bibi's Collection that you can get here. I started with a 700 x 700 and am working with PSP X2 Ultimate. I used papers 6, 4, and 11 from the back. I used masks RBsummermask4, MisfitsChoiceMask 4, and MythMask31 from the back. These masks are from Creative Misfits Creations here. At any time, you can gradient glow and/or drop shadow in the process. Element 27 was placed in a corner in front of the last paper to show what I wanted, duplicated, mirrored, duplicated, flipped, duplicated, mirrored, and merged all the layers down to have all four together. Next, is the second paper. Element 73 is in front of that placed to show parts where you want. Element 72 is in front of that. I placed it in a corner, duplicated, mirrored, and flipped, so I could have them in opposite corners to show. Element 33 is in front of that. I placed it on the side where I wanted it, duplicated, and mirrored to have them on either side. Element 58 is in front of that. I placed it in a corner, duplicated, mirrored, and flipped it to have them in two opposite corners. Element 3 is in front of that. I placed it where I wanted it, duplicated, and mirrored, so it is like an X on the image and show. In front of that, I have the last paper. I put the effect of blinds on it. You can do it however you want to look. I put element 64 in front of that to look like I wanted. Element 34 is in front of that where you want it to look. Element 31 is placed like a moon in the front of the cloud element and behind element 7, so you can move them how you want them to look. Next in front of element 7, I put element 5 in a place I wanted, duplicated, and flipped it. You can place it how you want. In front of that, I have element 56. From there, you put the tube you want. I am using the beautiful tube of Alex Prihodoko you can buy at PFD here. You need your own watermark, the artist's copyright, and the name you want on it.
Below, I used another Alex tube, an Arthur Crowe tube, and a Barbara Jensen tube on the ones I made with the same background. One has a couple more elements in it

Thursday, January 2, 2014
Chaotic Perfection PTU
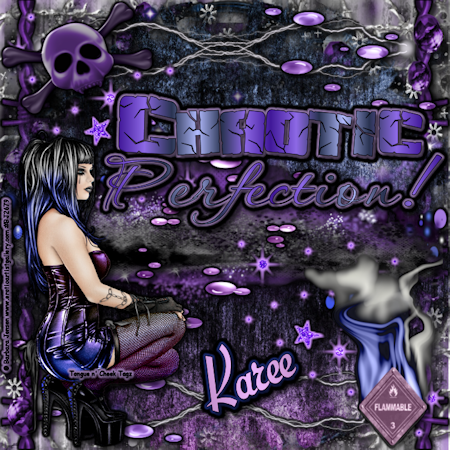
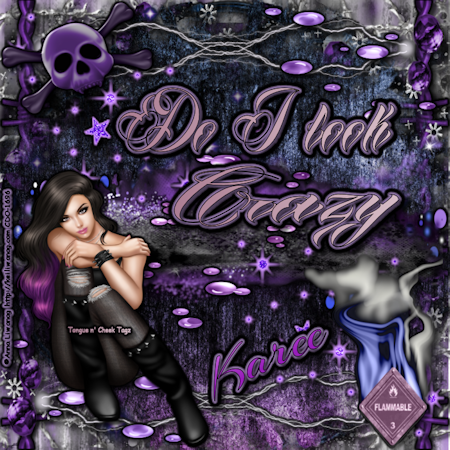
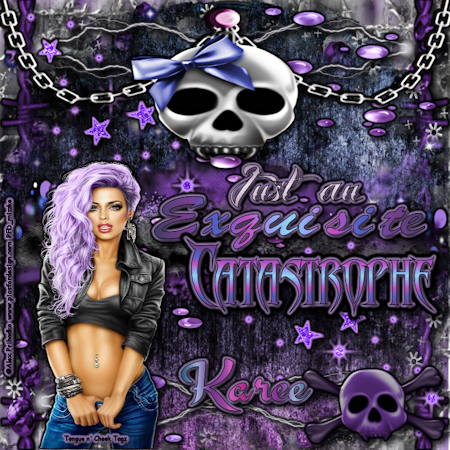
This is my creation. I used the awesome art of Barbara Jensen you can get here. Plus, I used a wonderful scrap kit by Disturbed Scraps at PicsForDesign that you can get here called Sci-fi Girl. I started with a 700 x 700 new Image. The papers I used from the front are 4, 12, and 10. The masks I used were MisfitsChoiceMask 4, MythMask 22, and MythMask 66. These can be found at Creative Misfits Creations here. Ok, Element 1 is in front of the last paper 10. Fit it to the page, and you gradient glow and/or drop shadow where you want in this process. Element 63 is placed in front of that where you want to be able to see it. In front of that, element 85 is placed where I wanted, duplicated, and flipped to see it on top and bottom. I did do some hue and saturation to make the tube and parts of the kit to look different colors. The second paper is in front of that, so you have element 110 in front of it with it placed where you want on the side, duplicated, and mirrored to the other side. Element 98 is in front of that placed where you want to show it, duplicated, and flipped to have on top and bottom. Element 95 is in front of that placed where you want, duplicated, mirrored, and flipped to have them show. The last paper is in front of that. Element 43 is in front of that where you want it to show, and element 145 is placed in the upper portion of the tag between the barb wires, duplicate the layer, and flip, so they are on the bottom and top. This is where you create the cloud looking effect in the middle. Element 73 is placed where you want to see the parts you want with element 139 in there for some color. Element 87 is on top of that how you want it. Element 137 is put to where you can see parts of it, and element 105 is on top of that. Element 104 is on top of that placed in the corner of your choice, duplicated, mirrored, and flipped to have it on either side. From there, element 99 is placed in the other corner, duplicated, mirrored, and flipped to have it so it is on either side. I always merge those layers down. Element 10 I used Eye Candy 5 Nature Smoke on it. You can decide how much smoke you want on it. Element 20 I beveled with Eye Candy 5 Impact and put in the corner. You can put a copyright, watermark, and whatever statement with a name on it! Make sure you see the ones below. A couple have different elements. I used Anna Liwanag, Alex Prihodko, and Elias! Hope you enjoy the tutorial, and you can always show me what you did. Hugz~~
Saturday, December 14, 2013
Life is a Dream - PTU Snow Queen kit Barbara Jensen tube!

Start with your canvas of 700x700. I used two masks. Mask6bywynter and MC_Mask 13. Most of my masks are from Creative Misfits and Vix, but these are from Creative Misfits here. I used papers 2 and 3. You can gradient glow and drop shadow, wherever you wish. I do it a lot to make things stand out, or to make them look darker. Element 3 is right in front of the back paper. Place it how you like to be able to see as much as you like. Element 5 is front of that the same way as the element before. Element 19 is in front of that. I placed one where I wanted it, duplicated, mirrored, and flipped, so the would be going different ways. Merge those layers together, when they are placed right. Element 72 is placed in front of that to show as much as you want it to with a duplicate and flip. Plus, you merge the layers together. Element 70 is in front of that one with an inner bevel from eye candy 3.1 and drop shadow to make it seen. Your front paper is in front of that with the second mask. Element 51 is in front of that paper. Place the first one where you want it, duplicate, move the second one where you want it, and merge the layers down. Element 46 is in front of that one, sized smaller to fit, and made to stand out. Element 72 is placed in front of that where you want it. Element 4 is in front of that placed how you want it to look. Element 2 is in front of that with a placement of how you like. Element 65 is in front of that with a placement of how you prefer it to look. Element 21 is in front of that fit to the canvas. Element 37 is in front of that around the moon elements with the other element of 26 in front of it sized to fit where it needs to be. Element 73 is placed behind the moon element to look like you want, so element 24 is in front of it sized to fit. In front of that, I put element 8 sized to fit and look right. The tube is the awesome work of Barbara Jensen with a quote by Mother Teresa on it. I love the whole quote, but you can't fit it all on a tag. From there, you make sure you have a copyright, watermark, and a name on it. Below, I have other tags I made with this background. They are different looks for it. One has the work of Alfadesire, and the other two have the work of Disco_science. Anyone with questions can find my email address on the right side, and you can show me what you did with the same kit! I would love to see what you did with my tut. Hugz~~ Karee


Saturday, November 16, 2013
PTU - Keith Garvey Before You Judge Me
I used the wonderful work of Keith Garvey on this that you can get here. My scrap kit is called Black Velvet by Starz Creationz that you can get here. I use PSP X2 Ultimate, so let's get started. Using a 700 x 700, I started with three papers 5, 6, and 10. I used three different masks called SD Mask #2, SKDS circle mask 2, and Sparkle Mask 1 by Tonya. They are all available at Creative Misfits here. I play with my masks by stretching and making them smaller. I took element 43 Feather, and element 46 White Feather. Each of them, I placed where I wanted and, throughout, I gradient glowed and dropped shadow where I liked. I took frame 6 and frame 7 to size them how I wanted. Individually, I sized each and used the magic wand. Selections, Modify, and expand to what size will cover the size you make with element 64. If you need to change element 64's size to fit, you can resize and make it bigger. I promoted layer, deleted the old layer, and put the promoted layer behind the frame for each one. Then, I merged both frames and ball layers together, placed them where I wanted them side by side, and I merged those layers down together. In front of that, is element 20 Sparkles that I put where I wanted, duplicated, and mirrored, so I could have them where I wanted. I took elements 30 White Starz and 31 Black Starz, so I could have them in the corners I wanted. With each element, I duplicated, mirrored, and flipped, so each color would be in separate corners. I merged the Black Starz together and the White Starz layers together for more control. My paper 5 and mask by Tonya are in front of that, and I made it smaller with a flip to it, so my element 11 Glitter could be seen in the image. In front of the paper/mask layer, there is element 12 Splatter placed where I wanted, duplicated, and mirrored. They are not together and are far enough apart, so you can see both splatters from below and above. I placed my words Judge Me in the next layer, but for the background you use the 11 Glitter where you want it and flip it to have two on the image. For the front layer of my background, I place element 5 and element 6 Pearls in the places from the top that I wanted, merged the layers, duplicated, and flipped, so it could be at the bottom, too. From there, I put my tube, my copyright, watermark, wording, and name on it. Below are two more I made with the background changed a little. Both are using the wonderful art work of Barbara Jensen you can get here. Hope you enjoy the tut, and you can always send me remarks, show off tags, questions, etc. at the email on my page.
Monday, December 31, 2012
Different I will always be
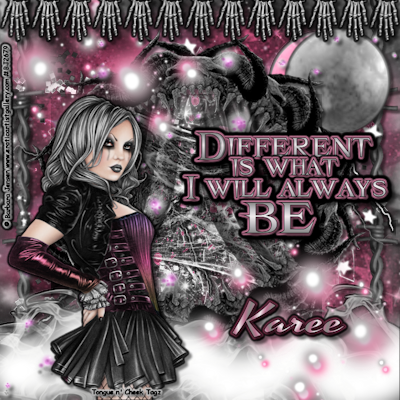
This was made by me, Karee, December 31st, and any resemblance to another tag is coincidence. It is an original. I am using the beautiful tube of Barbara Jensen that you can get here. The scrap kit is BiBi's Goth 3 that I got at Pics for design which you can get here. I used a lot of elements in this one because it has a lot of them.
I used four papers and two masks to get the background. The papers I used were 7, 8, 9, and 10. I did use the same mask for each which is DBV misfit mask 4 which you can get at Creative Misfit Creations here. Element 63 was added into the background between the front two layers, too. Everything is fit to size, and remember the gradient glow and drop shadow on anything you want at anytime. Going from the last layers to the front, the next layer is element 68 that I free rotated 90 degrees to the left, duplicated, and mirrored. Next is element 70 that I fit to go inside the framework of the round element. Element 90 is on top of that, and I mirrored and flipped it to see more color. Element 60 is in front of that to give some glitter, and it was duplicated, mirrored, and flipped. Element 61 was put to look like the shine was coming from the moon effect. Element 63 was then put around the outer edges of the framework, so it could be seen on edges. Element 106 was put to look like it was behind the moon, but could come out of the edges of the framework and seen through it, too. Elements 21 and 22 were put together in the upper right corner to give the moon effect. Element 11 was put into the framework like it is there with gradient glow and drop, but element 71 was flipped and mirrored without the gradient glow to show white in front. Element 72 was put on duplicated twice with one flipped, and one pulled down to cover the whole mouth of the framework. Element 91 was put up so it fit the framework of the round mouth element, but showed the inside, too. Element 46, the framework, was put and sized to fit, so it wasn't too big in the picture. Element 20 was put at the bottom to fit it and make the cloudy effect. Elements 6 and 7 were placed in the left corner with a mirror and flip to have them on the corners together, but not on top of each other. Elements 110 and 111 were placed on the page, so they were by each other and not on top of each other. Element 2 was placed at the top like a curtain. With that, I put my watermark and Barbara's copyright on it to start my own wording and name. Any questions or tags you want to share can be sent to my email at mizzundaztood1@gmail.com. Thanks for stopping by!
 Below is using the work of Tim Lowery you can buy at AIL here. Essentially, you keep the spiderweb element that I put a gradient glow and drop on, but delete the other one. Take out the curtains and the mouth framework. Instead, you put element 45 after the sparkle you put on three times. Put element 51 after the cloud effect below the cross. Put element 13 and 12 next to each other, and merge the layer down. Element 4 goes in right after 2, so you change it to fit the screen. You put your watermark, the Tim Lowery copyright, and whatever wording you want with a name. I liked this kit, and it was big enough to make more than one tag! Questions and tags go to mizzundaztood1@gmail.com. Thanks, again! Hugz, Karee
Subscribe to:
Posts (Atom)
About Me
- Karee
- Dismal, Kansas, United States
- My name is Karee, and I am a single woman with no kids, except my cat, Onyx. I have been doing tags and PSP for quite some time. It has to be over 6 years, but I haven't kept track. It is what I do to relax and have fun. I run a tagging group on My New Boomer Place, but it is called Grade A Smartasses! Come over there to join in. Hoping to have more FTU and PTU tuts here for you all. Tongue n' Cheek Tagz means I put a statement on my tags, so mine have more than just a name on them! Hugz~ Karee Btw, I can't seem to get blinkies to work on my page for right now. I CT for AIL and follow a lot of blogs. As soon as I can get them to work, I will try to get the blinkies up to make them accessible.
Grab my blinkie

Blogs I fav/CT

TWI