My Blog List
-
-
-
Friday. New Kits loaded to PFD8 years ago


Subscribe To


 Posts
All Comments
Posts
All Comments
Monday, October 13, 2014
 Follow No One ~ PTU
 Posted by
Karee
Posted by
Karee
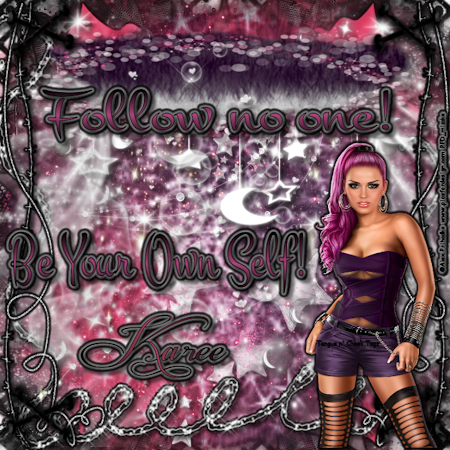
This tag uses a beautiful tube by Alex P. from PFD that you can purchase here. The kit is from Bibi, and you can get it here. I always start with 700 x 700, and you can gradient glow and/or drop shadow anytime you want in the creating process, depending on how you like it. I used papers 1, 2, and 7. The masks used are Mask12_Kreations and Circle2byTonya-vi. These masks are at Creative Misfit Creations here. My last layer is element 60 placed how I wanted, duplicated, mirrored, duplicated, flipped, duplicated, mirrored, and merged all those down to one, so four in one layer. Element 51 is next with the same process. I make them where I can see them. I check, when I am done to make sure all can be seen. Element 61 is in front of that with the same process. Element 59 was done the same way in front of that. Paper 1 with the first mask is the next layer. The sizes are different depending on how I want them to be seen. Element 100 is in front of that with the duplicate/mirror/flip, so there are four where you want them on one page. Paper 2 is next with the same mask as Paper 1. They aren't going the same ways because of flipping one. Element 92 is placed where I wanted it in front of that. Element 23 is in front of that about in the middle, so I can see it on the sides. Element 78 is in front of that. I made it larger. Element 87 is next, and I made it larger, too. Element 53 is in front of that placed how I wanted it seen. Paper 7 is in front of that with the Circle mask. Element 55 is placed next, and I believe it is rotated 90 degrees to be up and down. Element 29 is in front of that. Element 28 is in front of that placed like I wanted. Element 98 is next sized to how I wanted. Element 48 is in front of that. Element 26 is placed on one side how I wanted, duplicated, mirrored, and merged down. Element 25 is in front of that. Element 40 is in front of that placed to be seen. Element 30 is in front of that placed to come down from the cloud like formation I will tell you about later. Element 95 was placed on a side to fit, duplicated, mirrored, and merged down. Element 24 was placed with element 99 and 36 to form the cloud looking formation. Once I had them how I wanted, I merged them down, so they stayed together. Element 58 was placed to be seen in front of that. Element 38 was placed on a side how I wanted, duplicated, mirrored, and merged down. Element 41 was done the same way. Element 37 was sized as appropriate for a corner, duplicated, mirrored, duplicated, flipped, duplicated, mirrored, and all layers merged down, so to have four of them the way I wanted. From there, I placed my tube, artist copyright, my watermark, my statement of choice, and a name to finish the tag off. I hope you enjoy! I have more than this one, but it is the one I chose to show here. My group in new.myboomersplace.com will see the rest. The group is called Grade A Smartasses, so you can join to ask for tags if you would like. Hugz~~ Karee
 Labels:

Tuesday, September 30, 2014
Darkness Within ~ CT Freya Langford-Sidebottom PTU
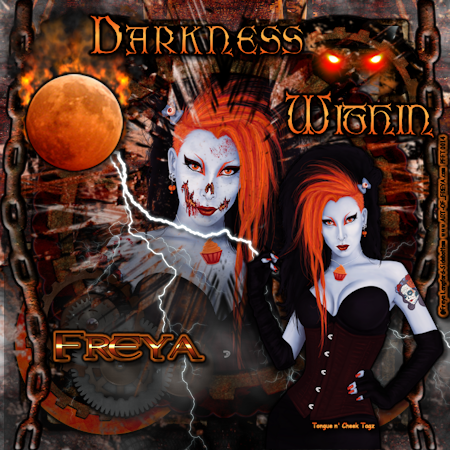
I am using the beautiful tube from the September emag of Pinup Fantasies that you can get here. There more tubes in the mag. Plus, you can add their Facebook page to learn more about the issues as they go here. The kit I used was called Dread 107. I bought it here, and it is by Digicats (and Dogs). Ok, I started with my usual 700 x 700 image. Gradient glow and/or drop shadow whenever you want to. I am at a loss right now cause my pick option isn't working, so I have to resize everything, instead. Hope it is easier for you. I used papers 3, 8, and 13. The masks I used were hsqm0y, AP_SparkleMask1, and BreezeGrungeMask1. I am thinking I got these from Creative Misfits Creations here. Below, is the first mask in case you can't find it. My bottom two levels are paper 3 with the hsqm0y tag. One of them is as it is, and the other is flipped. Frame 04 is the next layer sized to your liking. Frame 07 is next I put one to be seen on one side, duplicated, mirrored, and merged down. You might save it to do later, but the Spider Web is next, and it is sized to fit like it is in the Frame 02. I duplicated, mirrored, flipped, and merged down. Paper 8 is next with the Breeze mask. Get it to look how you want cause my sizing changed it some. Frame 02 with the promoted selection from the tube with the gore are the next layers. In front of that, paper 13 with the AP mask. Place it how you want your tube to be seen. Fog element is the next layer, but I colored it how I wanted it. The rusted chain is next put the way you want it. I duplicated, mirrored, and merged down. The lightening element is next, and I put it to look like it was coming from the moon. The fireball element I put where I wanted, duplicated it, mirrored, and merged down. In front of it, I put the moon, so it looked like it was coming from it. The spooky eyes I place where I wanted. From there, I put my tube, my copyright, my watermark, my statement, and a name. I hope you enjoy the tutorial! I had fun playing with it. I have another pic I made from the same background below with a different tube from her. Hugz~~Karee


Tuesday, September 9, 2014
FTU Army of One - CT Freya Langford-Sidebottom
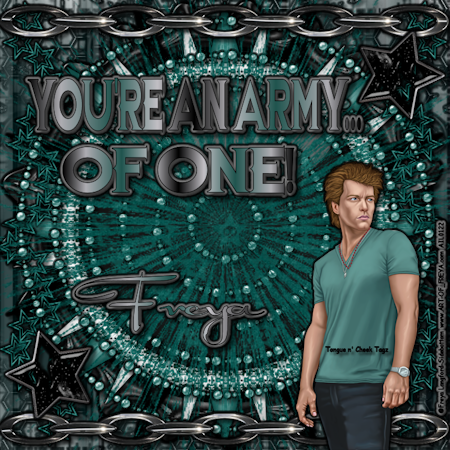
I am using the fantastic art of Freya Langford-Sidebottom. Her art can be seen here. It is wonderful! This tube, you can get at artistically inclined licensing here. The FTU kit is from Wicked Princess Scraps here. The song I used can be heard/read because it is a lyric video here at that link. Reminder that you can gradient glow/drop shadow in this, whenever you would like. I start with my 700 x 700 image. I used papers 3, 14, and 15. Masks used are 099LT, 199InsatiableDreams, and 14v0509. I think you can get them at Creative Misfits Creations here. Paper 14 is using the first mask and is the last layer. Element wire1 is the next layer. I put it where I wanted it seen, duplicated, mirrored, duplicated, flipped, duplicated, mirrored, and merged all of them down. Skull3 is the next layer with the vines being seen where you want, and you do the same process. Glitter1 is the next layer with the same process as the first two. Paper 3 is next with the 14v0509 mask inverted transparency. Bottlecap2 is the next layer. I made it as big as I wanted and used eye candy 5 bevel. Frame2 is the next layer sized how you like it. Stars3 is the next layer from top to bottom. BeadedCircles is the next layer with size how I wanted. Paper 15 is next with the remaining mask. Chain element is next across top and bottom. Star4 is next sized and placed where I wanted, and I think I used bevel on it, too. From there, it is copyright, watermark, statement, name, and you have your tag! Hope you enjoy! Karee
Sunday, August 24, 2014
Goodbye Endless Summer Nights CT for Freya Langford-Sidebottom
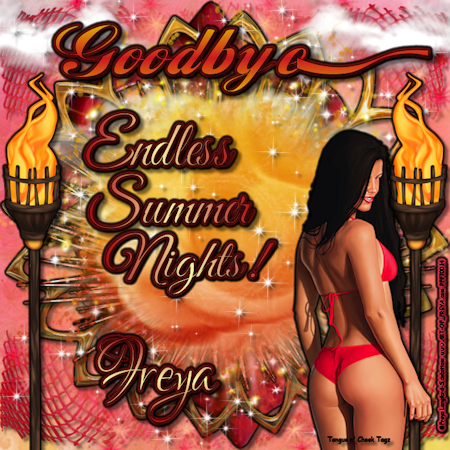
Ok, I am using the beach bunny tube from the emag from June 2014 Issue 08. You get get it here. I used the kit Tropicos Caliente from PinkParadox Productions. You can get it here. It is my ode to summer ending. I began with my image of 700 x 700. You can gradient glow and/or drop shadow to your liking at any time in this process. I used papers 22, 24, 27, 28, and 29. I used masks AP_SparkleMask2, b, and chas22mask. I am thinking you can get them all at Creative Misfits Creations here. The last layer is paper 24 with mask b. Next, I put element 97 the way I wanted to see it, duplicated, flipped, and merged together. Papers 22, 28, and 29 are all in front of that sized how you want with the AP mask. Element 79 was put how I wanted and sized how I wanted, duplicated,flipped, moved to where I wanted, and merged down. Frame 1 is in front of it. Might want to put is sized how you like to get element 79 right. Element 76 was colored how I wanted and placed where I wanted in front of the frame. Element 142 was placed where I wanted, duplicated, mirrored, and merged down. Element 144 was put in front of that how I wanted. Paper 27 is in front of that with the chas mask in a size you like. Element 143 was placed and sized how I wanted, duplicated, flipped, and merged down. Element 93 was placed on the side at size and place I wanted, duplicated, mirrored, and merged down. From there, you can place your tube, the copyright, your watermark, a statement, and a name. Hope you enjoy it! It is very different for me, but I like new things.
Saturday, August 16, 2014
Unique Friends ~ CT for Freya Langford-Sidebottom
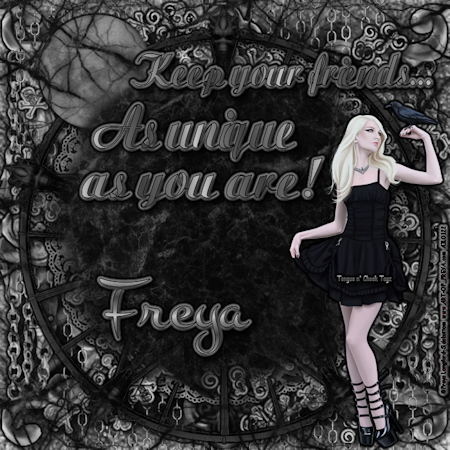
Ok, I am using Freya's tube Raven that you can find here. The kit I used was A Lil Goth by Mellie Beans at PFD that you can get here. I started with my 700 x 700 image. The papers I used are 01, 07, and 12. Masks were 562, 400x450msk015LT, and 260c3ld-vi. I am thinking I got them from Creative Misfits Creations long ago. They have their page here. During this process, you can gradient glow and/or drop shadow at any time. All right, I paper 07 as the last layer with 562. Next, I put element 09 where I wanted it seen, duplicated, flipped, and merged down. Element 02 is in front of it the way I wanted to see it. Plus, I duplicated, flipped, moved where I wanted, and merged down. Element 04 is next. I placed it to be seen, duplicated, rotated 90 degrees, and merged down. Paper 01 is next with the 260 mask. Element 01 is next where I can see the edges of it. Element 13 is next. I moved it around to see how I wanted it seen. Element 14 is next. Sized how I wanted to leave things seen and have it stand out. Element 50 is the last element that is placed where I wanted. Paper 12 is the last layer before the tube with the remaining mask. From there, you add your artist copyright, your watermark, a statement, and a name! Hope you enjoy cause I had fun creating her! You can always reach me at the email. Thanks, Karee
Sunday, August 10, 2014
Inner Beauty CT for Freya Langford-Sidebottom
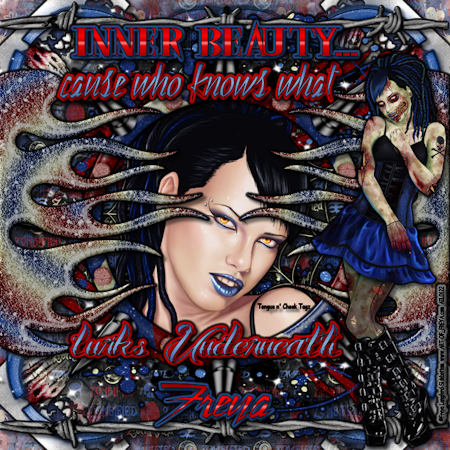
This is original and was made by me. I used both Harmageddon and Harmageddon-Zombified on this tag. You can purchase them here and here. The kit is Zombified by Kristin aka Toxic Desirez. You can get it here. Ok, start with you image of 700 x 700. I used papers 1, 2, and 9. You can gradient glow and/or drop shadow at any time in this. The masks I used were Circle4_byCora, cg_mask0079105, and b. I believe you can get them all at Creative Misfits Creations here. The bottom layer is paper 9 with the b mask. Next, I have paper 2 with the cg mask. The razor blade element is in front of that. I placed it in a corner sideways like I wanted it, duplicated, mirrored, duplicated, flipped, duplicated, mirrored, and merged all those down to one layer. The butterfly element is in front of that. I put it how I wanted it seen and did the same process to make four of them in a merged layer. The logo element is in front of it with the same process of making them all one layer, and you see them where you want. In front of that, is paper 1 with the circle mask. Then, I put the splatter element on, duplicated, flipped, and merged the layer down. The sparkles were put on, placed how I liked, duplicated, flipped, and merged down. At this point, you should put frame 1 on where you like. Put the web element behind it to fit. I used the magic wand in the frame to put the close up in it, and I moved it behind the frame. I added the flame element, and I put it on a side to my liking. I beveled it with alien eye candy5, mirrored, and merged down. The barbed wire element was put on and placed where I want. I believe it is beveled, too. From there, I put the other tube on, the artist copyright, my watermark, my statement, and a name. Can reach me at the email. Happy tagging! Karee
Monday, July 14, 2014
CT Freya Langford-Sidebottom Gotta Be Me
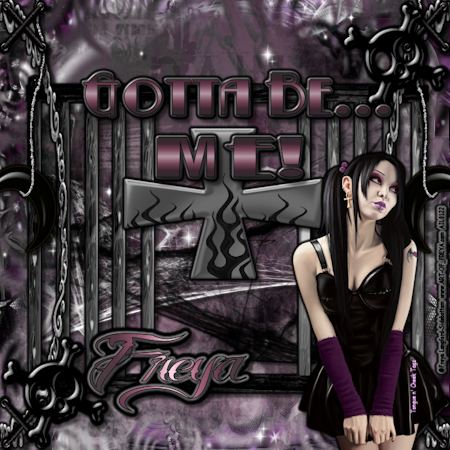
I am using Freya Langford-Sidebottom's tube Lorelei. You can get here. The kit is Pink Paradox Productions called Lil Goth Girl. You can get it here. I start with my 700 x 700. The papers I used were 1, 17, 18, and 29. Not in that order. I used the mask edge ripples and dmsk0387. I would tell you where to get them, but I, honestly, don't know. They are early ones, and I thought dmsk had a site, but I couldn't find anything. I used the edge ripples on both purple papers and the dmsk on the black ones. Ok, the black papers and 29 are at the back. All of your elements can be gradient glowed and/or drop shadowed to your liking. In front of that, element 67 is placed to see what you want. Element 77 is in front of that. I put it towards the bottom where I could see some of it, duplicated, mirrored, and merged down. Element 69 in front of that where you want it to be seen. Element 47 was put on, duplicated, mirrored, and merged down to see parts of it Frame 8 is in front of that wherever you want it to be seen. Element 161 is in front of that where you want to see it. Element 76 is in front of that to create a lighter background behind the front paper. Element 118 is in front of it. I placed it where I wanted to see it, duplicated, flipped to liking, and merged down. Element 81 is in front of it. I placed it sideways to liking, duplicated, mirrored to liking, and merged down. Element 82 is in front of that with doing the same process. Element 169 is in front of that the way you want to see it. Element 163 I colored to my liking and placed it in front of that where you can see it. Element 164 is in front of that. I put one on a side where I liked it, duplicated, mirrored to liking, and merged down. Element 159 is in front of that. I put it towards the bottom where I wanted it Paper 1 is in front of that. Element 165 is in front of it to how you want it. Element 168 and 162 are in front of that, but you might place frame 13 in front first to size them to fit it. Element 113 was turned sideways and placed where I wanted on the side, duplicated, mirrored, and merged down. Element 110 is put where I want is on a side, duplicated, mirrored to liking, and merged down. Element 122 was put in a corner where I wanted, duplicated, mirrored, duplicated, flipped, duplicated, mirrored, and merged all those down to one layer. Element 70 I beveled with alien skin eye candy 5. I placed it in a corner how I wanted, duplicated, mirrored, flipped, moved how I wanted, and merged down. Element 68 was placed in the middle and beveled, too. From there, I put artist copyright, my watermark, add my statement, and any name. I hope you enjoy. I have asked for others to show me their work, but no one likes to show anything, I guess. I had fun, so I hope you do. Hugz~~ Karee
Subscribe to:
Posts (Atom)
About Me
- Karee
- Dismal, Kansas, United States
- My name is Karee, and I am a single woman with no kids, except my cat, Onyx. I have been doing tags and PSP for quite some time. It has to be over 6 years, but I haven't kept track. It is what I do to relax and have fun. I run a tagging group on My New Boomer Place, but it is called Grade A Smartasses! Come over there to join in. Hoping to have more FTU and PTU tuts here for you all. Tongue n' Cheek Tagz means I put a statement on my tags, so mine have more than just a name on them! Hugz~ Karee Btw, I can't seem to get blinkies to work on my page for right now. I CT for AIL and follow a lot of blogs. As soon as I can get them to work, I will try to get the blinkies up to make them accessible.
Grab my blinkie

Blogs I fav/CT

TWI