My TOU
My personal TOU is:
Do not post my entire tutorial on any sites. Just share the url link. All my tutorials are of my own creations and can't be claimed as your own. Any resemblance to other tutorials is purely coincidental. If you need to contact me for any reason, you can reach me at mizzundaztood1@gmail.com. Also, if you would like to share your tut results with me, please send them to the above e mail address. I would love to see your view on what I have here! Hugz~ Karee
Do not post my entire tutorial on any sites. Just share the url link. All my tutorials are of my own creations and can't be claimed as your own. Any resemblance to other tutorials is purely coincidental. If you need to contact me for any reason, you can reach me at mizzundaztood1@gmail.com. Also, if you would like to share your tut results with me, please send them to the above e mail address. I would love to see your view on what I have here! Hugz~ Karee
My Blog List
-
-
-
Friday. New Kits loaded to PFD8 years ago
Followers
Thursday, January 31, 2013
 Sassy and Classy - PTU

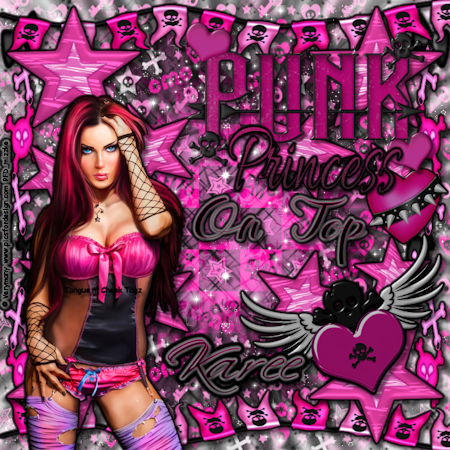
For this tag, I am using the art of Verymany. You can purchase his/her work here. I am using a kit by Pink aka Starz Creationz that is called Tickled Pink with Emo that you can purchase here. I start with the 700x700 image, so let's get started.
My background is three different masks with three different papers. I used papers 4, 5, and 6. I took the sparkles and placed them how I wanted them in the left upper corner. From there, I duplicated and mirrored, duplicated and flipped, and duplicated and mirrored. I merged all those layers down to have just one. Used Emo string 1 on the side to size as I liked, and mirrored it. Remember to gradient glow and/or drop shadow on anything whenever you want. I used Heart 2 where I wanted and beveled it with eye candy 4. I used Emo pary and merged it a bit to fit across. The erase tool helped me merge, so it didn't look off. I put it where I wanted on top and duplicated with a flip. I put the stars in the upper left corner like I wanted and mirrored with a flip. I merged those layers to duplicate it and mirror it. That way, I had stars on all sides. I took the skull heart and beveled it, too,. Placed it in the bottom right hand corner where I wanted. From there, I put my copyright, watermark, and any words I wanted! I would love to see any you make from this. I have two added tags below I made with Zlata's art work and Verymany, again. Remember, mizzundaztood1@gmail.com to show me your stuff or ask questions. I am open to anything. Thanks for viewing and make yourself a follower ;) .

Wednesday, January 30, 2013
 Templates...
I know there are a lot of templates that are cool and nice to work with, but does anyone make a tag from scratch anymore?! Templates have seemed to take away the creativity that was the tag from scratch. I like them, and I use them, but I try to mess up the stuff as much as I can, so it seems mine. I just like making them from scratch. Does anyone agree, or am I out here on my own? Would appreciate any feedback. Thanks, Karee
Sunday, January 20, 2013
 Dark Beauty with FTU kit

With this tag, I am using the art of misticheskaya from Pics for Design. You can purchase her here. The scrap kit I used is from Alikas Scraps. It is in the PTU now FTU area here. She makes wonderful scrap kits, so it is worth looking into.
Open your new image 700x700, for me. I used papers 5, 7, and 10 for the background, and two different masks. Before I start, remember to gradient glow and drop shadow when and where you want. Element 60 was copy and pasted. Free rotate it 90 degrees, so you can put it on the side. Duplicate and mirror, so it is on both sides. Element 65 was copied and pasted behind it, so that it fit between the openings on element 60. When it was where I wanted it, I duplicated, and mirrored. I repeated with a flip and mirror of that to get four of them. Element 38 was copy and pasted. Free rotate it 90 degrees, so you can put it across the top. Duplicate the layer and flip. Element 28 copy and paste, so you can place where you want it. From there, mirror and flip. Element 17 was placed on there where you want, and I flipped it to have the thicker side on top. Take the magic wand and paste element 56 in there. Promote and delete, so the mirror ball is in the background. Take the magic wand to element 17, again, past the tube, move to where you want, promote, and delete. Make sure the promoted layers are behind the frame. I duplicated the layer. On the back layer, I changed the properties to Luminance (L), and front was put on screen. Element 35 was copied and pasted on there to fit half, so you can duplicate and flip the layer to have it all over. Element 26 was copied and pasted in behind that. It was placed in the corner where I wanted and duplicated with a mirror and flip to make it go in both corners. Element 15 was put in the corner and done the same as Element 26, except I used the hue and saturation of 8 and 0 to make it the gray color. Element 34 was copied and pasted on there to see it on the bottom. Then, I put a mirror and flip on it to have it go the other way on the top. Element 53 is the last in front of the background. I moved it around to see as much as I could of it with all of the stuff in front of it. From there, you put the copyright, your watermark, whatever you want to say, and a name on it. I would love to see what anyone does with this, so you can email them to me at mizzundaztood1@gmail.com. Plus, that is for questions, too. Thanks for viewing, and I hope you become a follower! Hugz, Karee
Below, I just differed in elements and put more promoted layers with frame I chose. Plus, I am using her art from Scraps and the City that can be purchased here. Any questions about it can be sent to the same address above.

Thursday, January 17, 2013
 No Angel

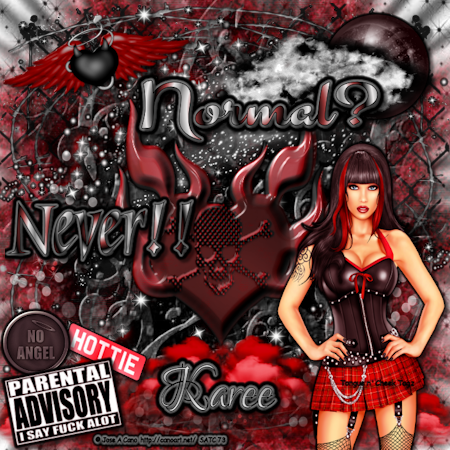
Here is another tut from me. I used the art work of Di Halim from pics for design. That you can purchase here. The scrap kit I used is called Hot Jinx by Bibi's Collection. It can be purchased at Scraps and the City here. Filters used are Eye Candy 3.1 and Eye Candy 4. Remember to gradient glow and drop shadow, whenever you desire.
To start, I opened my 700 x 700 image. I used papers 3, 13, and 14 for the background with two different masks. Between the front two mask layers, I copy and pasted element 41, and I sized it to fit in the corner to be seen. Duplicated the layer and mirrored it. In front of that, I pasted element 65 and sized to fit. Element 81 was put in front of that to where I wanted, then duplicated, and flipped it, so it could be seen the way I wanted. Now, the rest is in front of the mask layers. Element 73 was put on to look like it was an effect coming from the moon. Element 53 was copy and pasted on where I wanted, duplicated, and flipped to have it on the top and bottom. Element 51 was put on to look like it was coming up from the bottom cloud effect. Element 11 was copy and pasted on, duplicated to the number you want, and spread to different areas to have them appear around the tag. When I duplicate an element, I, usually, merge the layer down when the fit is right, so I can move it how I want and put effects all at once. Element 19 was put on and sized to fit. I duplicated it. The back one was inner beveled with eye candy 3.1, and the front one I used bevel with eye candy 4 and inner bevel with 3.1. I changed the properties on the front and back, so they would appear the way they are. Element 33 was copy and pasted and sized to fit the bottom of the tag. Element 76, 56, 43, and 13 were used to copy and paste wherever you want to show them. (You may notice that element 56 has the word a lot spelled wrong.) Element 37 and 77 were placed to show a moon with a cloud cover effect. From here, you put your watermark, copyright, and whatever wording you want on the tag. Below, I used the Jinx tubes that can be bought at Scraps and the City, too, and the scrap kit was made to go with them. Please ask questions or show off tags made from my tuts! I would like to have a slide show to show off others, someday. Hugz and thanks for stopping by, Karee

Thursday, January 10, 2013
 Tag show off by Freya Langford-Sidebottom
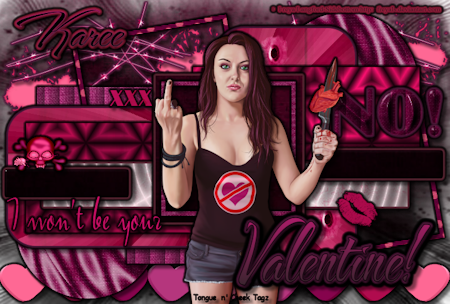
I used a template by Divine Intentionz here, and a tube by Freya Langford-Sidebottom that you can purchase at Artistically Inclined Licensing here. The scrap kit I used is called Suicide Love and can be bought at Scraps and the City here.
Tuesday, January 8, 2013
 Fans in Denial
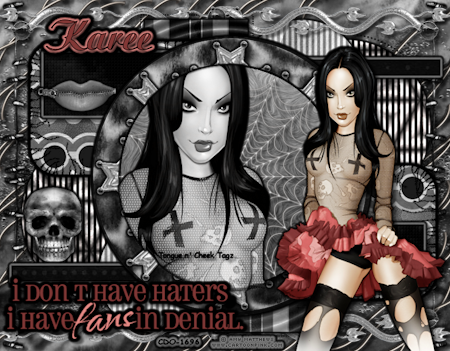
With this tut, you will need the template 455 from Divine Intentionz Here. I am using the artwork of Amy Matthews from CDO. You have to have a license and can purchase her tubes here. You will be needing the filters Eye Candy, Tramages, Xero, Xenofex 2, and dsb flux. The scrap kit used is called Baby I was Born this Way by Soxsational Scraps sold at Artistically Inclined Licensing here.
Let's start: Open the template, and shift D to duplicate. Delete the name layer. Select the front circle, float, defloat, and paste paper 11 on it. Promote the layer and delete the rest. Effects Eye Candy Swirl with default settings. Select the circle behind it, float, defloat, and paste paper 10. Promote the layer and delete the rest, again. Effects Tramages to Accelerating Glass. Select the white circle, float, defloat, and paste paper 12 there. Promote the layer and delete the rest. Select the black squares, float, defloat, and paste paper 3. Promote the layer and delete. Use Xero with fritillary with default settings. Select the larger rectangles, float, defloat, and paste paper 9. Promote/delete. Use Xenofex 2 with cracks with default settings. Select the squares, float, defloat, and paste paper 1. Promote/delete. Use dsb flux with spider web with default settings. With all the dotted spots, select, float, defloat, and paste paper 3. Promote/delete. Select the thin rectangles, float, defloat, and paste paper 12 to fit. Promote/delete. Select the smaller circles, float, defloat, and paste paper 2. Promote/delete. Use Tramages with gradient/spokes ratio with default settings. Select the larger circles, float, defloat, and paste paper 7. Promote/delete. Use Tramages with Hex Lattice using default settings. As for the back ground, I have two masks using paper 10 and paper 11. In all of this, you can gradient glow and drop shadow when you want and where you want. I took the close up of the tube, selected the front circle, and pasted her on there. Promote/delete. I set her properties to Luminance (L). You can use whatever elements you want. I used Blin 2, Blin3, Skull 2, staples, web1, wire, and zipped lips2 on my tag. With the word art, I selected the white back, floated, defloated, added a raster layer, and flood filled with black. I selected the front word art, floated, defloated, added a raster layer, and colored it with a darker color from the skirt on the tube. Again, I selected the layer I had just colored, floated, defloated, added a raster layer, and colored the word fans with a lighter color from the skirt. If you can't just keep it to the word fans, use the erase tool to make it fit the word. Add watermark and copyright with a name, and you are done! My TOU works for all my tags. Thanks for stopping by and become a follower ;).
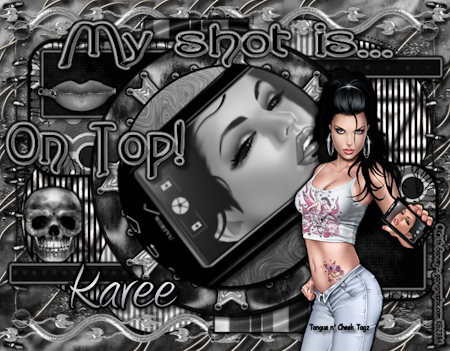
Friday, January 4, 2013
 Star of Life
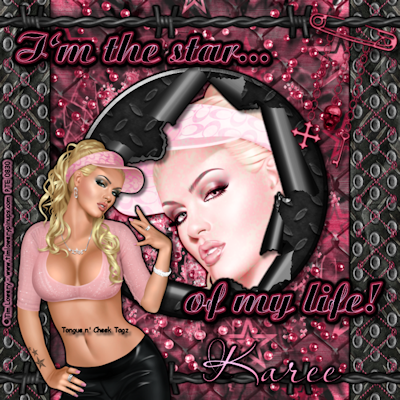
This tag was made by me, Karee, on January 3, and it is original, so any resemblance to another tag is coincidence.
Open an image the size you like. Mine are, usually, 700 x 700.
I am using the work of Tim Lowery. I got him from PTE, but he is, now, at Artistically Inclined Licensing here. The scrap kit I used is by Scrapz n Pleasures, and it is only at Scraps and the City here.
I used three different papers, and two different masks. The papers I used were 4, 7, and 8.
In between the front layer of the masks and the second, you can put element 28. Right in front of the masks, you put element 37 and fit to size. Remember to gradient glow and drop shadow whenever you want. I took element 31 and fit it to the lower left corner to fit to size. Then, I mirrored and flipped it and merged the layer down. I duplicated that layer and mirrored it. Element 49 was placed behind 36, so it was fit to size behind it with some out on the edges. Take the magic wand to the middle of element 36, modify to expand by 4, and copy and paste the close up. Promote that part and delete the rest, so you have the face looking through. Duplicate that layer, and you put the properties of screen on the front layer and Luminance Legacy on the back layer. I took element 48 and free rotated it 90 degrees. I sized it on the sides to fit. On top of that, I put element 25 and sized to fit. Element 47 was placed on the top to fit the image, duplicated, and flipped. Element 43 was sized to fit on element 47 to appear as if it was dangling. From there, you use tube of choice, watermark, copyright, and whatever wording you want. Remember, questions or tags to share go to mizzundaztood1@gmail.com. Thanks for viewing!
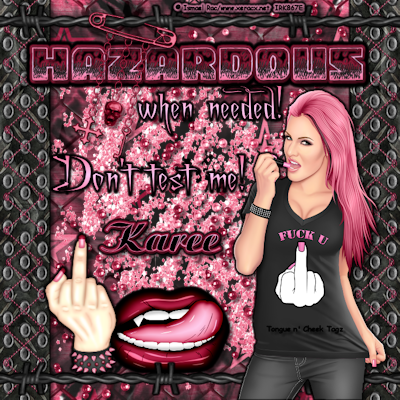
For the tag below, I used the art work of Ismael Rac which you can purchase here. The scrap kit was made for this tube specifically. I didn't duplicate my layer with element 31. I didn't add 36, and I did add elements 11 and 4. Moved element 47 over, too. Plus, my fit to size on the glitter element was bigger.
Subscribe to:
Comments (Atom)
About Me
- Karee
- Dismal, Kansas, United States
- My name is Karee, and I am a single woman with no kids, except my cat, Onyx. I have been doing tags and PSP for quite some time. It has to be over 6 years, but I haven't kept track. It is what I do to relax and have fun. I run a tagging group on My New Boomer Place, but it is called Grade A Smartasses! Come over there to join in. Hoping to have more FTU and PTU tuts here for you all. Tongue n' Cheek Tagz means I put a statement on my tags, so mine have more than just a name on them! Hugz~ Karee Btw, I can't seem to get blinkies to work on my page for right now. I CT for AIL and follow a lot of blogs. As soon as I can get them to work, I will try to get the blinkies up to make them accessible.
Blogs I fav/CT


